# Introduction to Test-Driven-Development in React for Beginners
The first rule of Test-Driven-Development (TDD) is to write a test before coding the feature. It sounds more intuitive when doing some backend work, to be honest, but does it work when doing some frontend, particularly in React. 🚀
In this article, we'll explore TDD in React with a simple component.
## The feature
In this article, we'll reproduce the following component. A simple -- and very ugly 🤧-- counter.
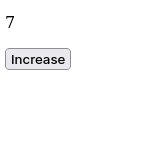
Well, it'll do the work for what we want to understand here because we are focusing more on the functionalities than the aesthetic.💄
## Setup the project
First of all, create a simple React project.
```shell
yarn create react-app react-test-driven-development
```
Once the project is created, make sure everything works by running the project.
```shell
cd react-test-driven-development
yarn start
```
And you'll have something similar running at http://localhost:3000.
## Writing the Counter feature
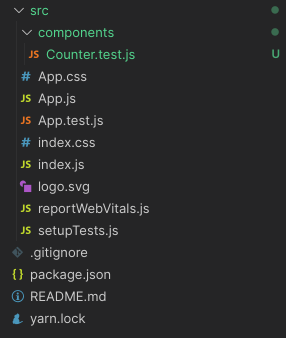
Create a new directory in the `src` directory called `components`. This directory will contain the components we'll be writing. And inside the new directory, create a file called `Counter.test.js`. As stated earlier when doing TDD, we write tests before coding the feature.
It helps establish a better architecture for the feature because you are forced to really think about what you are going to code and test.
### Description of the Counter component
The ideal component takes a prop called `value`. This value is then shown on the screen in a
tag.
Great! Let's write the test first.
### Writing the test
Inside the `Counter.test.js` add the following content.
```js
import { render, screen } from '@testing-library/react';
import Counter from "Counter";
```
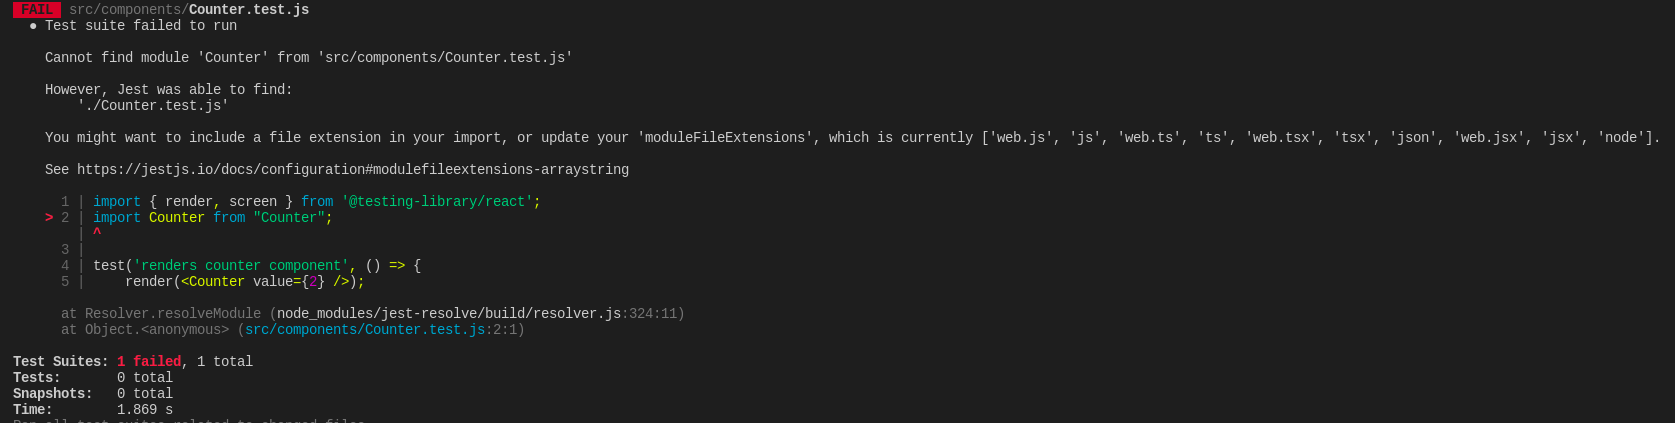
We start by importing the needed tools to write the test. Don't worry about the second line, we haven't created the `Counter` component yet. The goal of TDD is to make sure the test fails first before writing the feature.
With this, we can now write the first test.
```js
test('renders counter component', () => {
render();
const counterElement = screen.getByTestId("counter-test");
});
```
Here, we render the `Counter` component in the DOM and we retrieve the element. There will be two things to test here:
- Is the component rendered?
- Is the Counter showing exactly 2 as the value?
```js
test('renders counter component', () => {
render();
const counterElement = screen.getByTestId("counter-test");
// Testing that the counter element is rendered
expect(counterElement).toBeInTheDocument();
// Testing that the counter element has the correct value
expect(counterElement).toHaveTextContent("2");
});
```
Great! Now in the command line, run the following command to run the tests.
```shell
yarn test
```
The command will fail naturally.
Great! Let's move on and write the component.
### Writing the component
Inside the component directory, create a new file called `Counter.jsx`. And inside this file add the following content.
```js
import React from "react";
// This is the component we are testing
function Counter(props) {
const { value } = props;
return (
{value}
);
}
export default Counter;
```
Now run the tests again and everything should be green.
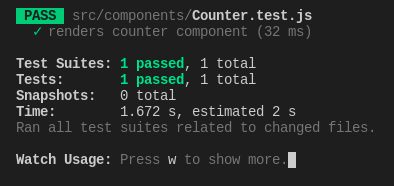
Nice! Nice! We've done a great job. The next step is to add this component to the `App.js` and with a `button` to trigger a state change. And we'll also go TDD for this.
> You may have an issue with a similar error in the terminal after running the tests.
```shell
Warning: ReactDOM.render is no longer supported in React 18...
```
Check this answer on [StackOverflow](https://stackoverflow.com/questions/71685441/react-testing-library-gives-console-error-for-reactdom-render-in-react-18/71716003#71716003) to see how to resolve it.
## Writing the full Counter feature
In this case, we are now adding a button to modify the value in `Counter.jsx`. As we are going to write directly the code in `App.js`, let's write the test first in the `App.test.js` file.
### Requirements
The requirements of this feature are:
- Click on a Button to increase the shown value by 1
Pretty simple right? Let's write the test first.
### Writing the test
The `testing-library` provides tools we can use to trigger actions on a Button. Very nice!
Let's start by importing the needed tools. As we are going to trigger a click event on the screen ( clicking the button ) to increase the value in the counter, the tests functions will be asynchronous.
```jsx
import { render, screen } from '@testing-library/react';
import App from './App';
import userEvent from "@testing-library/user-event";
```
The `UserEvent` is a tool that simulates a user triggering actions such as clicking, typing, and much more. And here's the test.
```jsx
import { render, screen } from '@testing-library/react';
import App from './App';
import userEvent from "@testing-library/user-event";
describe('Render the counter with Button', () => {
render();
it("render counter", async () => {
const appElement = screen.getByTestId('app-test');
expect(appElement).toBeInTheDocument();
// Testing that the counter element has the correct default value
const counterElement = screen.getByTestId('counter-test');
expect(counterElement).toHaveTextContent('0');
// Retrieving the button element
const buttonElement = screen.getByTestId('button-counter-test');
expect(buttonElement).toBeInTheDocument();
// Triggering the click event on the button
await userEvent.click(buttonElement);
// Testing that the counter element has the correct value
expect(counterElement).toHaveTextContent('1');
})
});
```
Great! The tests will fail normally. Let's write the feature.
### Writing the full counter feature
Inside the `App.js` file, add the following content.
```js
import React from "react";
import Counter from "./components/Counter";
function App() {
const [count, setCount] = React.useState(0);
return (
);
}
export default App;
```
We are using React.useState to manage to track and modify the state.
After that, run all the tests again. And it should be green.🟢
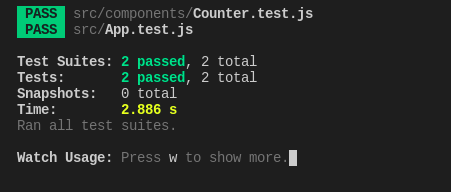
And congratulations! We've just done some React using TDD. In the next article, we'll dive deeper into TDD but with Redux and thunk. We are going to set up a full testing environment independent of a remote backend. 🔥
Pretty interesting, right? Well, if you want to get informed about it, I am starting a newsletter. If I pass 10 subscribers, I am kick-starting it weekly.🚀
You can subscribe [here](https://www.getrevue.co/profile/koladev32).
*Article posted using [bloggu.io](https://bloggu.io). Try it for free.*